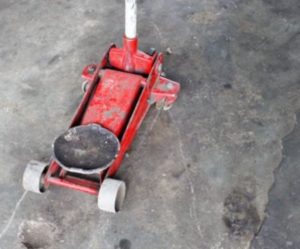
 At times, some incidents run parallel to each other and coexist. For instance, on the way, your car breaks down, and you go to take out a floor jack to repair your vehicle. A wave of dismay encircles you when you see a broken floor jack placed in front of you. Hence, a person should know how to rebuild your floor jack if it breaks down.
A floor jack or hydraulic jack has a specialty that can be rebuilt. A car jack is often discarded if it malfunctions. However, a person can repair and rebuild a floor jack. Before rebuilding a floor jack, rule out any other possibility interrupting its functioning—for instance, insufficient hydraulic oil, presence of air, etc.
A procedure for fixing a floor jack
Rebuilding guidelines will help repair a floor jack if it is not working correctly. Rebuilding a floor jack can be done in the following ways:
Step 1
The prime task in rebuilding a floor jack is to drain all the hydraulic oil present in a floor jack. To do so, remove the drain plug and replace it when the oil is drained. After draining, clean it thoroughly.
Step 2
Now lose all the bolts that have firmly held the handle assembly. Dispatch the handle assembly and pump piston that lies underneath. You can perform all these tasks by hand.
Step 3
The next step is to remove the release valve. Unscrew it by using a pencil magnet. Make sure to keep the ball and cap together while removing it. An overload valve is a present closer to the release valve. Remove it by releasing the bolt. Now remove both the balls and springs using a pencil magnet. Ensure to note where you have removed the bolts and nuts to recall later.
Step 4
Now remove the piston from the floor jack by eliminating the tank nuts using a pipe wrench. Once the piston is out, all the remaining pieces will fall apart.
Step 5
The next step is the evaluation of all the O-rings and seals. Now reinstall the new o-rings and washers. Take special precautions while removing the old rings. To facilitate the installation, immerse the new o-rings and washers in oil.
Step 6
Now rearrange the piston back inside the bottle by adjusting the tank nuts. In the overload valve, reinstate all the balls and springs. It goes in order, starting from the smallest ball to a large spring. Replace the cap as well.
Step 7
In the release valve, reinstall the ball. Now put back the pump piston and reassemble the hand assembly. Remember to put back bolts from where you have removed them.
Step 8
It is the last step in rebuilding a floor jack. Refill the floor jack with hydraulic oil. Bleed the system to eliminate any excess air present inside the jack. This process opens the release valve and manually pumps the handle rapidly. Now wipe and clean the jack to remove the oil of any residue.
Conclusion
The most probable cause of floor jack breaking is wearing out of o-rings and rubber seals. Fortunately, its fixation is not a difficult task. It needs evacuation of the whole assembly of the floor jack and then reinstallation of o-rings and washers. Before rebuilding a floor jack, also evaluate the oil level inside it. If the floor jack has inadequate hydraulic oil, it cannot sustain the pressure. Therefore, check for the external leak and the presence of air inside the floor jack. To get rid of excess air, bleed the system. Hence, look for possible defects before invading the floor jack from the inside.

- Craftsman Jack Stands Review - October 18, 2022
- OTC 1545 Motorcycle Lift Review - October 18, 2022
- Pro Lift Jack Stand Review - October 17, 2022