 The problem of leaks seems menial; however, it is anything but that. Be it your floor jack that’s leaking or any other machine, it affects the performance of the machine. Not to mention, leaves nasty stains all over the floor. Thank goodness there is a way to stop the fluid leaking from the floor jack without having to throw the machine out.
I say this with as much sincerity as I can muster up, a floor jack leaking can turn into a huge nightmare that can easily annoy any user. I had to watch a gazillion videos online to get an idea of how to stop the leaking from my machine.
To keep you from going through all the pain that I had to go through, I have narrowed down the entire procedure into a couple of simple and easy steps. So, in merely a few minutes, you will be able to halt the leaking from your floor jack.
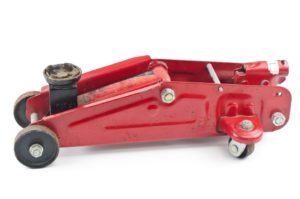
How To Fix A Floor Jack That Leaks Down
In the following simple steps, you should be able to fix the leaking issue of your floor jack that is leaving nasty oil stains on your flooring.
Items Required
In order to successfully fix the dilemma of leakage of your floor jack, you will need a couple of items. You will need a wrench, needle nose pliers, and a brand new O-ring. You are also going t need a small container and a lint-free cloth.
Step 1
Place our floor jack on your work table and you will see that the release valve of your floor jack will be dripping with hydraulic fluid. Leakage in the release valve is mostly due to a damaged O-ring, which needs to be replaced. So, to get access to the damaged O-ring, you will need to open the release valve. Take your wrench and fix it over the release valve and start twisting it anti-clockwise. Keep twisting the wrench till you have successfully loosened the release valve of your floor jack. Unscrew the release valve and take it off to get access to the rest of the parts.
Step 2
Once you have opened the release valve, then you need to place the container on the table and flip the floor jack upside down. Make sure that the opening of the release valve is right above the container. This step is important because we need to drain the valve from the fluid before we start working.
Step 3
Then place the floor jack back on the table. You will see hydraulic fluid still dripping from the retaining bolt. The reason behind this is that the damaged O-ring is inside the hydraulic ram. So, take your wrench and unscrew the retaining bolt present on top of the hydraulic ram. Once it has been unscrewed, remove it and pull the hydraulic ram out of your floor jack.
Step 4
Now you need to remove the damaged O-ring present inside the hydraulic ram and replace it with a new one. For this step, you are going to need the assistance of your needle nose pliers. So, take your needle nose pliers, and remove the old O-ring with it. Once it has been removed then take the small piece of lint-free cloth and clean the inside of the hydraulic ram with it. Make sure that you remove all the fluid remnants as well as any build-up.
Step 5
Once the hydraulic ram is clean, then you need to take the new O-ring and put it inside. Make sure that you do this step carefully and do not damage the brand new O-ring in the process. After that, place the hydraulic ram back in the floor jack and jam the retaining bolt in its place. Put the rest of the parts back in their places too, and voila! You have successfully gotten rid of leakage from your floor jack.
Conclusion
A floor jack that keeps dripping and leaves oil residue all over the floor is a huge pain. However, running to the maintenance store for every minor inconvenience is not ideal. So, you need to learn how to fix the issue of leakage yourself. The article above lists a step-by-step procedure that will help you fix the dilemma of leakage.

- Craftsman Jack Stands Review - October 18, 2022
- OTC 1545 Motorcycle Lift Review - October 18, 2022
- Pro Lift Jack Stand Review - October 17, 2022